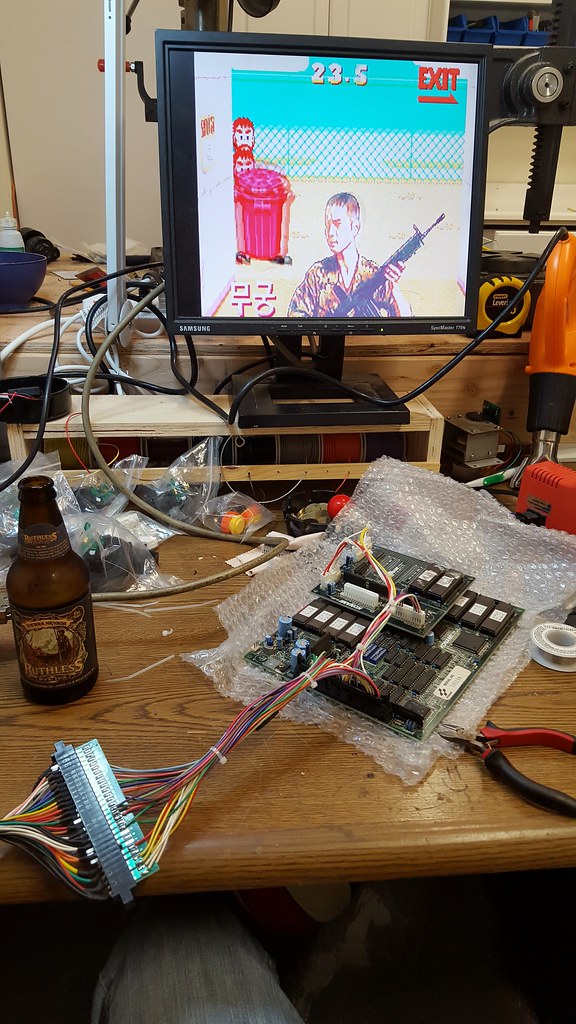
I finished today...

Electric Grave

So Many Posts
No Time
For Games.
15 Year Member
Joined
Jan 29, 2004
Posts
20,259
^Yeah, one hand on each cab...sounds like a winner...

@Skates, I love that setup, I used to play Unreal Tournament like that, kinda like the Panther sticks but with a separate peripherals. Congrats!
 
Last edited:

skate323k137

Professional College Dropout
10 Year Member
Joined
Jan 7, 2013
Posts
4,227
Thanks guys. Chinitosoccer, the joysticks themselves are the same ones from virtual on OT but I would have to mount them both to a single panel which isn't going to happen. They're a serious pain to disassemble even enough to remove.

EG, I gotta say I was pleasantly surprised. The trackball aim is pretty dope.
 

Electric Grave

So Many Posts
No Time
For Games.
15 Year Member
Joined
Jan 29, 2004
Posts
20,259
It is, I can't get over how much fun it is playing like that. Have you ever tried The Grid? You might be able to get a board and play it in your setup, it's a midway game though.
 

codecrank

Whip's Subordinate
10 Year Member
Joined
May 2, 2011
Posts
1,751
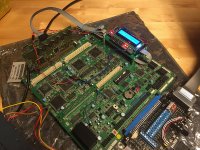
added a remote board extension to access the Toshiba PF D29C051's hidden service menus :D

24086161869_ac18efff74_c.jpg

24345659432_a10096fd52_c.jpg

24427760086_68b5e7c948_c.jpg


now I can mess with the pin cushion, pin balance ,etc etc
 

skate323k137

Professional College Dropout
10 Year Member
Joined
Jan 7, 2013
Posts
4,227
nice !!! you beat me to it :D , now bring your kits here so we can link up 4 together !!

seriously how's the multi like ? seemed pretty fun.

It's pretty solid multi player. It would definitely be better with 3 or 4 but 2 people on the harder maps is still good times. I might try to rig a 3rd panel with a new joystick and borrow a trackball from a golf panel. I have 3 carts and plenty of link boards but I'd have to rig another panel unless another one comes along.
 

BanishingFlatsAC

formerly DZ
15 Year Member
Joined
Mar 8, 2006
Posts
4,728
added a remote board extension to access the Toshiba PF D29C051's hidden service menus :D

24086161869_ac18efff74_c.jpg

24345659432_a10096fd52_c.jpg

24427760086_68b5e7c948_c.jpg


now I can mess with the pin cushion, pin balance ,etc etc

Is there a way to access this menu without that board? My tosh has a slight pincushion issue.
 

codecrank

Whip's Subordinate
10 Year Member
Joined
May 2, 2011
Posts
1,751
Is there a way to access this menu without that board? My tosh has a slight pincushion issue.

I suppose you could remove the normal board and manually gound pin 39 in the back of it ;)

joking apart, I think there is a way because I have somehow stumbled upon the extra geometry menu on accident, but I could not reproduce it...
 
Last edited:

miisalo

Astra Superstar
Joined
Jan 3, 2014
Posts
670
Actually this was finished few days ago, but here is first real install of my selector board for the Darksoft's st-v flash/multicart. Makes it bit easier to select games than the jumpers or dip switches

24926087902_24f00266e7_c.jpg

I have built 9 of these selectors now and at least 15 other has to be built once I get more PCBs
 

skate323k137

Professional College Dropout
10 Year Member
Joined
Jan 7, 2013
Posts
4,227
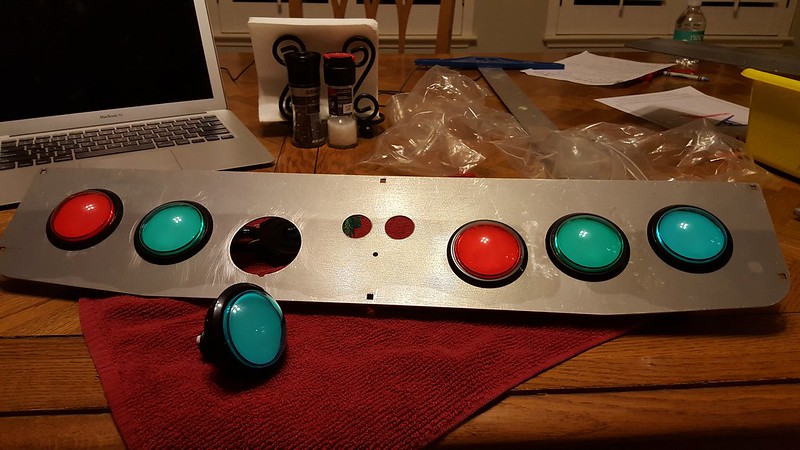
Thanks to Codecrank, I now have a bishi bashi panel

Everything used in this pic except the cab itself came from various members here, so thanks fellas

I used 12v from the extra button connector in the cab instead of the illumination wiring from the board, because I really didn't feel like running anything else through this cabs side rails. The cool part is that will work if I use a JVS-PAC with MAME. I used the NC on the microswitches to ground the lights, so the lights stay on unless you press a button, and they turn off while the button is down. Probably not as cool as the stock illumination setup but still better than nothing.

20160409_154000_HDR.jpg
 

kuze

Sultan of Slugs
10 Year Member
Joined
Apr 20, 2013
Posts
2,560
Thanks to Codecrank, I now have a bishi bashi panel

Everything used in this pic except the cab itself came from various members here, so thanks fellas

I used 12v from the extra button connector in the cab instead of the illumination wiring from the board, because I really didn't feel like running anything else through this cabs side rails. The cool part is that will work if I use a JVS-PAC with MAME. I used the NC on the microswitches to ground the lights, so the lights stay on unless you press a button, and they turn off while the button is down. Probably not as cool as the stock illumination setup but still better than nothing.

20160409_154000_HDR.jpg

That looks awesome! Haven't heard of the game but it looks interesting, so I'll have to check it out.
 

skate323k137

Professional College Dropout
10 Year Member
Joined
Jan 7, 2013
Posts
4,227
That looks awesome! Haven't heard of the game but it looks interesting, so I'll have to check it out.

It's a bunch of ridiculous mini games... Kinda like point blank but without guns. Fun party game.
 

codecrank

Whip's Subordinate
10 Year Member
Joined
May 2, 2011
Posts
1,751
Nice to see you got it all wired up ! about the lamp wiring, I planned on using the extra button loom on my NNC, and just make an adapter. it's 6pins and and a ground, and already ran through the cab, so that's perfect :D

here are some making of pics !

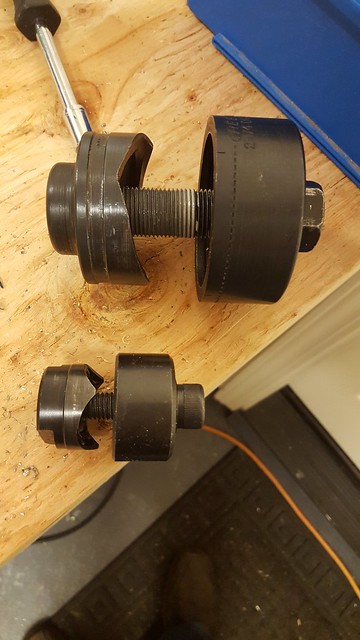
had to get this massive 2" 1/4 punch, it'll give you a workout, a 30mm punch shown for size reference :lolz:

26315962861_05dbab278d_z.jpg

26289815602_836dcf3924_c.jpg


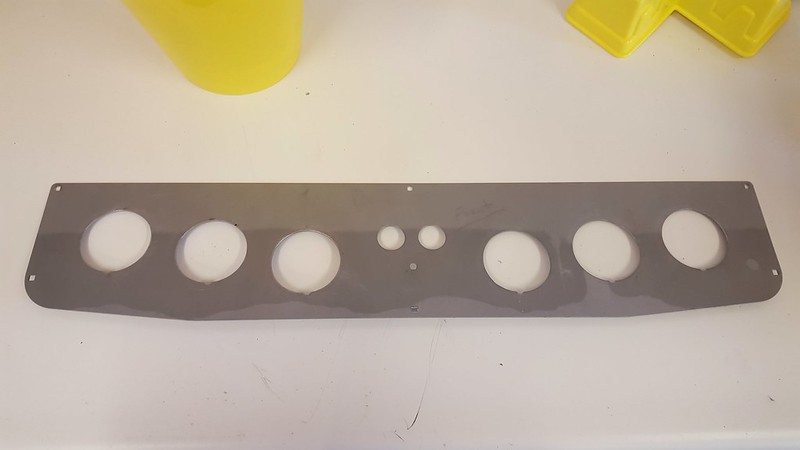
used generic 2" 3/4 dome buttons.

25246805612_5a56bb386f_c.jpg


a little gimp work later... if someone needs the full res artwork lemme know

26290222902_4b9f3e5afd_b.jpg


then I had to build a harness for my board, thx aoiddr for the pinout !!!!
https://docs.google.com/spreadsheet...RV_KHohYwfxssegxBIE58-j6U/edit#gid=1738171694

This had to be the most time consuming motherfuckin' harness I've ever build, worst than the VS kits... 4 different types of connectors, crimping, splicing, soldering...

26356315576_ae7a2e4a5e_b.jpg
 
Last edited:

skate323k137

Professional College Dropout
10 Year Member
Joined
Jan 7, 2013
Posts
4,227
Seriously impressed that you built that harness. Thanks again for the panel. I'm curious about the normal illumination setup, it would be cool to see a video when you're done.
 

codecrank

Whip's Subordinate
10 Year Member
Joined
May 2, 2011
Posts
1,751
cheap sun psu alternative... a psu from a broken dreamcast + 10$ worth or wires and connectors

26915075481_9e9d8880bd_c.jpg

26950303586_33637cc2d9_c.jpg


could use a case though.

sidenote, this works great for a naomi, but it won't power a model2 or model3, not enough juice
 
Last edited:

Lemony Vengeance

Mitt Romney's Hairdresser,
Joined
Jan 30, 2012
Posts
4,204
cheap sun psu alternative... a psu from a broken dreamcast + 10$ worth or wires and connectors

26915075481_9e9d8880bd_c.jpg

26950303586_33637cc2d9_c.jpg


could use a case though.

sidenote, this works great for a naomi, but it won't power a model2 or model3, not enough juice

You LITERALLY stole this project off my workbench. SERIOUSLY. I'm still trying to figure out how to case it so it's not just a bare board chilling out. Did you wire the power cable for a 3 pin AMP UP connector? I'm planning on using the Blast's 110v power out socket on the IO board to power it. I also bridged the power button so it powers on as soon as it's plugged in. :D

Awesome work dude! :D
 
Last edited:

codecrank

Whip's Subordinate
10 Year Member
Joined
May 2, 2011
Posts
1,751
You LITERALLY stole this project off my workbench. SERIOUSLY. I'm still trying to figure out how to case it so it's not just a bare board chilling out. Did you wire the power cable for a 3 pin AMP UP connector? I'm planning on using the Blast's 110v power out socket on the IO board to power it. I also bridged the power button so it powers on as soon as it's plugged in. :D

Awesome work dude! :D

hahaha you're welcome :D

I was thinking that you could leave the normal power plug disconnected and use the power button's AMP connector instead. hence you would only need to build a JST VHR-3N <-> AMP UP 176272 cable and that would work in a blast city, plexi glass and risers would probably be cheapest way to make a "case" for this. not sure how much of a RF shielding issue this would be..
 

Reclaimer

Haomaru's Blade Shiner
Joined
May 17, 2014
Posts
695
Nice work on the PSU! I have a stack of Dreamcasts with broken disc drives but otherwise working, I need to pillage them and rig up a PSU or two.
 

Lemony Vengeance

Mitt Romney's Hairdresser,
Joined
Jan 30, 2012
Posts
4,204
hahaha you're welcome :D

I was thinking that you could leave the normal power plug disconnected and use the power button's AMP connector instead. hence you would only need to build a JST VHR-3N <-> AMP UP 176272 cable and that would work in a blast city, plexi glass and risers would probably be cheapest way to make a "case" for this. not sure how much of a RF shielding issue this would be..

I haven't gotten to the point where I'm running my Naomi with it, but what do the voltages read while under load on a netboot setup? Do you happen to have an ammeter to measure how many amps are on each rail?
 

codecrank

Whip's Subordinate
10 Year Member
Joined
May 2, 2011
Posts
1,751
I haven't gotten to the point where I'm running my Naomi with it, but what do the voltages read while under load on a netboot setup? Do you happen to have an ammeter to measure how many amps are on each rail?

oh I'll have to measure that next time I get it out
 

skate323k137

Professional College Dropout
10 Year Member
Joined
Jan 7, 2013
Posts
4,227
Nice work on the PSU!

I worked on all three of my sega monitors today. Minor adjustments for screen / focus, gain / cutoff, geometry, and corner convergence with some yoke tabs. Took about 5 hours to do all three cabs, mostly time spend disassembling net cities and pulling the monitor from my blast.

I should have taken before/after pics. The corners on my blast were SO bad. One side looked like it had a pincushion issue the corners were so far out. After 3 yoke tabs and some service menu love she's looking great.

20160515_175602_HDR.jpg
 

Lemony Vengeance

Mitt Romney's Hairdresser,
Joined
Jan 30, 2012
Posts
4,204
Nice. I still need to hit my blast with some convergence strips. Been hesitant to do so because of the difficulty.
 

skate323k137

Professional College Dropout
10 Year Member
Joined
Jan 7, 2013
Posts
4,227
Nice. I still need to hit my blast with some convergence strips. Been hesitant to do so because of the difficulty.

I put if off for a year or two myself. Honestly... it's not bad. You have to clean the back of the tube around the yoke, and I used some duct tape over the self-adhesive of the strips I had just for good measure. Patience, patience, patience. Leave a hand behind your back if you're worried about the danger.

I had my GF hold a mirror for me so that I could be behind the monitor with a better look of how I was placing the strip. This helped a lot for the trickier corners. Once the corners were good I used the service menu to fix the geometry and I was golden.
 

ECZangief

The Real Al Bundy
Joined
Dec 20, 2009
Posts
772
Solid tweeking. And you're right, none of this stuff is too daunting... learn the basic safety stuff, have a drink and dive in.

Worst case you pull off a few wasted strips of sticky metal.


****HARDBOY EDIT****

Fun Fact: once you've witnessed Jambitboom play literal roulette with the convergence rings on the first monitor he's ever tube swapped, it strikes you that none of this bullshit is that hard if you're not a total dummy.

That crazy motherfucker had a perfect picture in like 10 minutes.
 
Last edited:
Top