You are using an out of date browser. It may not display this or other websites correctly.
You should upgrade or use an alternative browser.
You should upgrade or use an alternative browser.
iScan Pro upscaler problem (losing video signal)
- Thread starter Billkwando
- Start date
- Joined
- Aug 14, 2000
- Posts
- 1,768
You sure it isn't overheating? It kinda sounds like it. Maybe you just need to create a better heatsink for this thing.
That's what I was kinda trying to say. I'm just not sure if it's the psu or the unit itself that might be overheating. I've fondled them both extensively as of late and, though they're warm, they don't seem too crazy. I'm inclined to think it's the psu since switching it out seemed to cause a different length gap, but I guess to be truly scientific I'd have to leave the new psu hooked up for a few days and then run it, to see if it resumes the 7:50/2:50 pattern. Like I said before, I'm keeping it unplugged when not in use now, which would make it take longer to overheat, I'd imagine.
The manual I posted earlier in the thread has an actual internal photo of the board if you feel like having a look at the heatsinky-type thingers.
")
I was (not too) seriously considering laying the psu on a bag of ice or something just to see if that affected the dropout effect, for testing purposes.
Edit: The guys I got the iScan from were cool about it and sent me a refund for the $18 I spent on the PSU (remember this was a "no refunds" auction). That was nice.
")
Last edited:
- Joined
- Dec 1, 2005
- Posts
- 27,750
If you have a multimeter you can check how much current is being pulled. If it's close to 2A then I recommend getting one capable of 3A.
For the unit itself, you want to open it up since the temp inside and directly on the GPU would be the hottest. You can try putting a bigger heatsink on with some artic silver 5 compound or adding a fan to the unit. I don't know how much room is in there.
For the unit itself, you want to open it up since the temp inside and directly on the GPU would be the hottest. You can try putting a bigger heatsink on with some artic silver 5 compound or adding a fan to the unit. I don't know how much room is in there.
- Joined
- Aug 14, 2000
- Posts
- 1,768
If you have a multimeter you can check how much current is being pulled. If it's close to 2A then I recommend getting one capable of 3A.
For the unit itself, you want to open it up since the temp inside and directly on the GPU would be the hottest. You can try putting a bigger heatsink on with some artic silver 5 compound or adding a fan to the unit. I don't know how much room is in there.
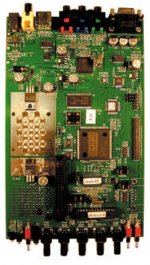
Here's a pic of the board I snagged from the pdf, but if you take a look at the manual, there's basically no room for a fan. A heatsink, maybe. The board slides in like a drawer. It's a very low profile device.
Do they make generic heatsinks you can just slap on to things?
Also, to check how much is being pulled, I'd need to have it on and running and just probe the DC jack connectors on the board?
As usual, I start googling around and find something else to worry about: http://forums.steampowered.com/forums/showpost.php?p=33847984&postcount=15
Basically they're saying that drawing the heat away from the chip can do more harm than good if it's inside a case and has nowhere to go. :/
Edit: Oh, I went googling for "iScan" and "heatsink" and looky what I found: http://www.curtpalme.com/forum/viewtopic.php?p=330597

Attachments
Last edited:
- Joined
- Aug 14, 2000
- Posts
- 1,768
Best thing would be to install a fan. Can you snap a pic of what this thing looks like and give me measurements of the unit?
Unless you have something against Adobe, you can see that here:
http://www.biggerhammer.net/mediaroom/dvdo/dvdo_iscan_pro_SiI-UG-0025-B.pdf
Also:


I don't have the exact measurements at the moment, but it's about the exact size as one of those Iomega external HDDs. The manual has decent pics of how the board fits inside.
Last edited:
- Joined
- Aug 14, 2000
- Posts
- 1,768
If there isn't any room for a fan, you can either install a bigger heatsink or you can mod the case to become the bigger heatsink.
You said bigger heatsink....is there a heatsink in there at all, or is that what the big silver box is?
- Joined
- Aug 14, 2000
- Posts
- 1,768
Hey Xian Xi, tell me if this advice looks familiar: 
That's interesting and everything, but can you believe they charge $79 for an AC adapter, and that it's 7amps??
Oh and about teh testing, what do you suggest as far as how to connect the multimeter, so I don't have to stand there holding the probes?
Hi Bill,
Thank you for contacting DVDO. If you have voltmeter perhaps you can monitor the voltage and see if there is drop when the image goes black.
Replacement power supply can be purchased on Amazon here.
Let me know if you have further questions.
Regards,
Ken Nguyen § Support Engineer §
Silicon Image, Inc. § 1140 East Arques Avenue §
Sunnyvale, CA 94085 § USA §
Tel: +1 408-616-4147 § Fax: +1 408-616-6398 §
§ www.dvdo.com §
That's interesting and everything, but can you believe they charge $79 for an AC adapter, and that it's 7amps??
Oh and about teh testing, what do you suggest as far as how to connect the multimeter, so I don't have to stand there holding the probes?
Last edited:
- Joined
- Aug 14, 2000
- Posts
- 1,768
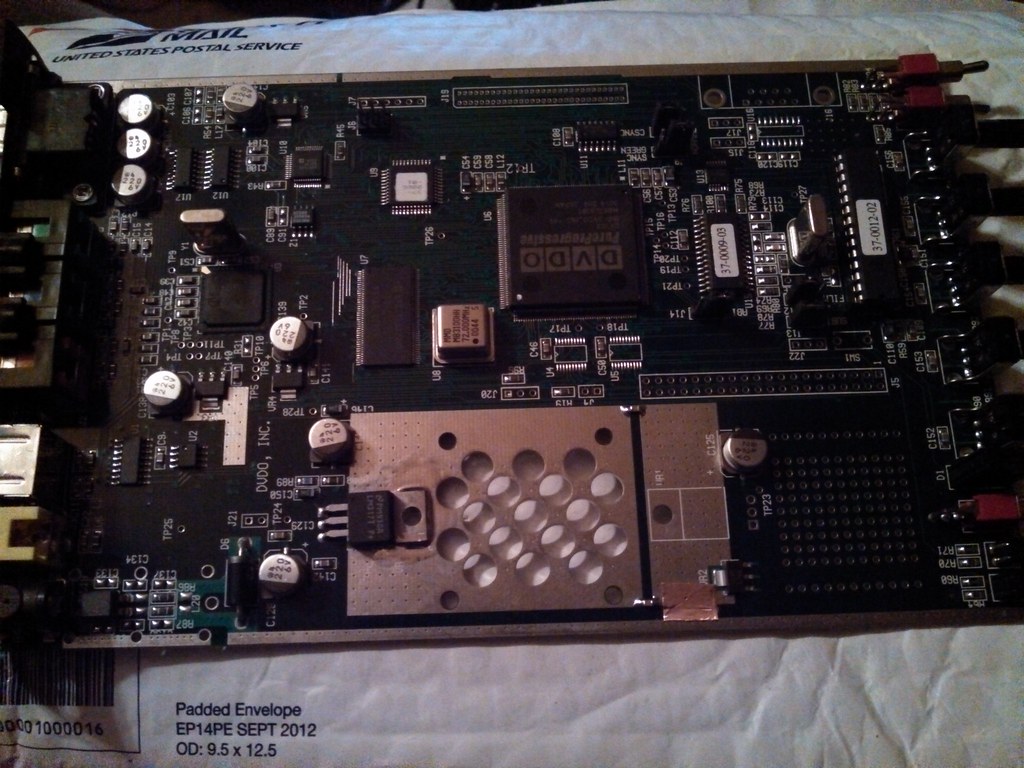
OK, so 3rd AC adapter (6v 7a this time) and the problem persists. However, I ran it for a long time (hours) with the case off today, and didn't notice a single drop out. Where would you stick a heat sink on here, and what's the part with all the holes about?
Seriously thinking about just drilling some holes in the case.
Seriously thinking about just drilling some holes in the case.
- Joined
- Dec 1, 2005
- Posts
- 27,750
If it were mine I would drill holes in the top and bottom of the case over the heatsink and put a small 5v fan on the outside of the case or the inside if it can fit. Either way, that thing needs air flowing through it.
Looking at the pic, how far apart are those 4 holes?
Looking at the pic, how far apart are those 4 holes?
- Joined
- Aug 14, 2000
- Posts
- 1,768
If it were mine I would drill holes in the top and bottom of the case over the heatsink and put a small 5v fan on the outside of the case or the inside if it can fit. Either way, that thing needs air flowing through it.
Looking at the pic, how far apart are those 4 holes?
The 4 holes are 30mm apart from each other. Is that the heatsink?
- Joined
- Dec 1, 2005
- Posts
- 27,750
The 4 holes are 30mm apart from each other. Is that the heatsink?
Put on one of these:
http://www.ebay.com/itm/EverCool-30...?pt=US_Computer_Case_Fans&hash=item1c350cf5d3
- Joined
- Aug 14, 2000
- Posts
- 1,768
Ordered. Thanks! So I should just screw it directly to the heatsink? Those holes do look like the right size. Do you think that's what they're there for?
Do I need washers or some kind of special mounting, or should the fan blades be recessed enough not to touch? Also, should I hook the wires directly to the 6v (6.41v w/ no load) even though the fan is 5v? I assume that's not enough of a difference to cause any concern?
Last edited:
- Joined
- Aug 14, 2000
- Posts
- 1,768
Bump?
- Joined
- Dec 1, 2005
- Posts
- 27,750
Ordered. Thanks! So I should just screw it directly to the heatsink? Those holes do look like the right size. Do you think that's what they're there for?
Do I need washers or some kind of special mounting, or should the fan blades be recessed enough not to touch? Also, should I hook the wires directly to the 6v (6.41v w/ no load) even though the fan is 5v? I assume that's not enough of a difference to cause any concern?
If you install it by cross tightening the 4 corners it should sit flat and the blades shouldn't touch the metal at all. Don't put spacers unless you want to. Tap it from a 5v source. Depending on which wire version you get for the fan, you just need to connect the 5v and ground, the 3rd wire is a speed control that you don't need. With the 3rd wire not connected the fan will run at full speed which is probably what your unit needs.
I would mount the fan on the bottom of the board and have the air move upward so if you drill holes in the case in the top and bottom it should keep everything flowing in the correct direction.
- Joined
- Aug 14, 2000
- Posts
- 1,768
If you install it by cross tightening the 4 corners it should sit flat and the blades shouldn't touch the metal at all. Don't put spacers unless you want to. Tap it from a 5v source. Depending on which wire version you get for the fan, you just need to connect the 5v and ground, the 3rd wire is a speed control that you don't need. With the 3rd wire not connected the fan will run at full speed which is probably what your unit needs.
I would mount the fan on the bottom of the board and have the air move upward so if you drill holes in the case in the top and bottom it should keep everything flowing in the correct direction.
Unfortunately, there is no room under the board, so if I do mount it internally (which I hope to....the fan is only 7mm thick) I'll have to have it sucking away from the board and blowing upward (right?).
I really didn't want to have yet another AC adapter by my TV, lol. Right now it's the iScan, the scanline generator, the component/RGB converter, and whatever console I happen to have plugged in (plus all my normal AV gear).
Other than possibly decreasing the life of the fan, is there any other concern with doing it the way I mentioned? Would it cause the iScan to be underpowered? Remember I'm using a 7amp psu, but if jumpering the red and black to the + & - on the board would cause it to require 11v (math-wise), then I'm stupid and need to go to electronics school.
Could I wire the fan to a USB cable and plug it into my nearby PC for power? This shit is just getting ghettoer and ghettoer. You don't wanna see the vents I cut with the dremel cutting wheel. LOL
Last edited:
- Joined
- Aug 14, 2000
- Posts
- 1,768
The fan only uses around 0.25A and the unit itself doesn't use close to 7A, more like 3A.
So you're saying I could do it the way I said without blowing myself up? I could use a regulator or a resistor or something if you think it's necessary.
I'm not gonna leave it plugged in all the time anymore, most likely. These things are obviously not as well built as everyone makes them out to be, or at least the one I got, anyway.
Currently I have a 2x 5v fan HDD cooler (one of which is broken) wired in parallel, and hooked to a 9v battery clip sitting on top of it, so I can just pop the battery on when needed......so 6v has to be a better bet for the fan's survival than that. LOL
- Joined
- Dec 1, 2005
- Posts
- 27,750
You can tap 5v from the board itself. Don't use 6v if you have a source for 5v.
If it can't fit on the bottom then put it on the top blowing upward. You can always install a switch to turn the fan on and off but you can just tap a 5v source on the board that kicks on when the power button is pressed and the fan will come on at the same time.
If it can't fit on the bottom then put it on the top blowing upward. You can always install a switch to turn the fan on and off but you can just tap a 5v source on the board that kicks on when the power button is pressed and the fan will come on at the same time.
- Joined
- Aug 14, 2000
- Posts
- 1,768
You can tap 5v from the board itself. Don't use 6v if you have a source for 5v.
If it can't fit on the bottom then put it on the top blowing upward. You can always install a switch to turn the fan on and off but you can just tap a 5v source on the board that kicks on when the power button is pressed and the fan will come on at the same time.
This thing doesn't have a power button. Where on the board would I get the 5v from? Is that something you can see in the pic are you just assuming there's one on there somewhere?
Edit: I see...."if"
But yup, blowing upward was the plan.
Last edited:
- Joined
- Dec 1, 2005
- Posts
- 27,750
You need to use a multimeter to check the voltages inside the unit. The LM317 is a regulator and you can check the output on the middle pin, if it's 5v then tap it there.
So there is no power button, so it's constantly on? No wonder this thing overheats. You can make a small box with a switch that plugs into the back of the unit and has a power socket in back for the power supply.
So there is no power button, so it's constantly on? No wonder this thing overheats. You can make a small box with a switch that plugs into the back of the unit and has a power socket in back for the power supply.
Last edited:
- Joined
- Aug 14, 2000
- Posts
- 1,768
You need to use a multimeter to check the voltages inside the unit. The LM317 is a regulator and you can check the output on the middle pin, if it's 5v then tap it there.
So there is no power button, so it's constantly on? No wonder this thing overheats. You can make a small box with a switch that plugs into the back of the unit and has a power socket in back for the power supply.
Yup. that's why it only lasted 7 minutes and 50 seconds when I kept it plugged in all the time, but it would go 15- 45 minutes if it'd been unplugged. It auto-detects when a signal is present, and goes into standby otherwise, but obviously the standby isn't very standby-y.
Interesting idea about the box.